
I’m feeling very creative this week, and
have been inspired to try making some unusual things for my daughter; chalk and
crayons. The latter came about, as she loves drawing (on everything, especially
the sofa with felt tipped pens, joy!), but breaks her crayons all the time, and
then can’t use them, as they are too short to grip. This made me think I could
somehow recycle the little pieces of crayon. So, having a look on Pinterest
(the best website in the world!), I saw some really simple recipes and ideas
for this, as well as a recipe for homemade chalk, and I thought I’d share.
CRAYONS
These are really sweet if you use shaped
silicon molds to make them. Fifi adores Mickey Mouse at the moment, so I have
sourced some Mickey shaped molds, but things like hearts and stars are easy to
come by (check out Amazon). A fairy cake tin would always work, but I’d line
it, just to be sure they pop out ok. They would also make great fillers for
party bags.

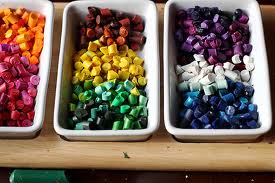
Get your old, broken crayons. Remove any
paper that might be around them and break them even smaller (or chop them if
they are a bit fiddly), so they fit into which ever sort of mold you are using.
Fill each mold up, either with crayons the
same colour or with a mixture, for funky coloured crayons.
Put in the oven at 150C for about 40
minutes, on a baking tray, until the crayons have melted. Do check frequently,
as it would make a horrible mess if they burnt or spilt!
Leave them to cool (or pop in the freezer
if you have an impatient child wanting to draw with them), and pop the new
crayons out.
CHALK
This is a bit more adventurous than the
crayons, as it involves buying ingredients and mixing stuff together. But it’s
not too hard, and makes the sweetest chalk sticks, which would be great for
using in the garden to draw hopscotch or just patterns on the ground.
You will need..
3 cups of plaster of paris (available in
craft shops or online)
6 tbsp powdered paint (this is a bit harder
to find, but if you Google it, there is loads online, in every colour
imaginable. If you go to an art shop, they might call it tempera paint, which
as long as it is powdered, is the same thing)
1.5 cups (approx) of water
Plastic boxes/bowls to mix (you need a
different bowl for each colour, unless you are planning to wash up between each
colour)
6 Toilet roll tubes
Waxed paper or baking parchment
Duct tape and a washable dish or tray
Cover one end of each of the tubes with
duct tape, and place upright on the tray (I secured ours with a bit more tape).
Then line them with the waxed paper or baking parchment. It’s a bit fiddly, but
means you’ll get them out easily at the end. If you can’t be bothered, you
could use plastic cups in place of the tubes.
Mix the plaster of paris with the water
(warm water is a bit easier to work with) and stir until smooth. You have about
20 minutes until this starts to set, so you need to work quite fast.
Decant the plaster into the smaller boxes
or bowls. Add the powdered paint to each batch. I did this bit by eye, adding a
bit at a time, until they were dark enough.
Once you have your desired colours, pour
them into the tubes and leave to set. It takes a really longtime for them to dry
out fully, I left mine for 2 days in a cool room. Then, just peel off the tube
and paper, and you have some home made chalk!


No comments:
Post a Comment
Please leave lots of comments or feedback! x